Non-Drill Mounting Solutions: How to Secure Panels to Balcony Railings
If you are a renter in the UK, your tenancy agreement almost certainly contains a “Make Good” clause. This standard legal provision explicitly dictates that any structural alteration—including drilling into external brickwork, concrete facades, or powder-coated metal balustrades—constitutes a breach of contract and guarantees the loss of your security deposit.
When approaching the addition of a plug-and-play solar kit, you must entirely abandon the concept of “installation.” You are not installing structural infrastructure; you are temporarily securing a high-powered consumer appliance.
The challenge is significant
Securing a 20kg, wind-catching sheet of glass to a railing suspended stories above a public pavement requires absolute structural integrity without utilizing a single drill bit. This guide provides a clinical evaluation of non drill solar panel mount UK solutions, detailing the physics of wind loads, comparing specific hardware options like the EcoFlow balcony bracket, and outlining the precise methods required to maintain total renter friendly solar panel mounting compliance.
The Physics of the Balcony: Weight, Wind, and Liability
*Estimated lateral force on a 2m² panel area.
1. The Weight Reality
Modern high-efficiency solar hardware is dense. A standard rigid panel, such as Anker’s 435W unit, weighs approximately 22kg. Even lighter modular options, like EcoFlow’s 400W rigid panels, weigh roughly 11kg each. When you attach this mass to the outside of a balcony using clamps, you are not just adding static downward weight; you are creating cantilevered rotational torque. The hardware constantly acts as a lever, actively trying to pull the top of your railing outward.
| Hardware Type | Avg. Weight per Panel | Mounting Requirement |
|---|---|---|
| Anker 435W Rigid | 22.0 kg | Heavy-duty steel brackets |
| EcoFlow 400W Rigid | 12.5 kg | Standard rigid clamps |
| Flexible / PET Panels | 3.5 kg | Stainless steel zip-ties / straps |
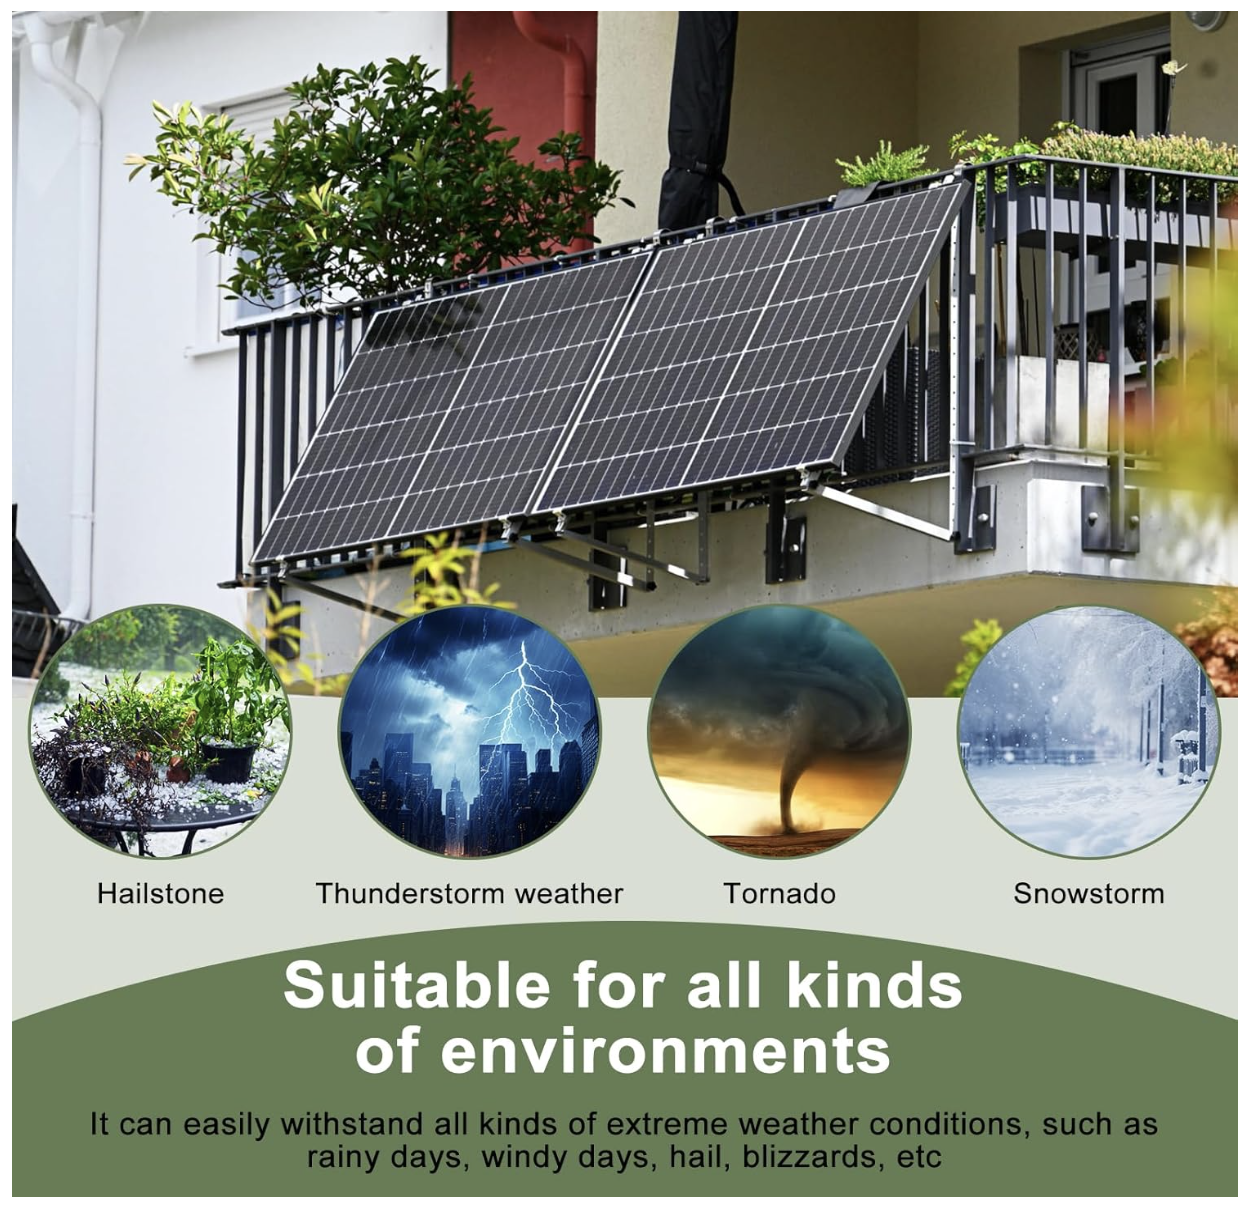
2. The Sail Effect
A typical 400W panel has a surface area of nearly 2 square meters. At elevation, this panel acts as a massive, highly efficient sail. High-rise apartment blocks experience severe wind shear and micro-vortices at the corners of the building. During a standard UK winter storm (60+ mph), the aerodynamic drag multiplies the effective weight pulling on your mounting brackets exponentially. Use the visualizer to observe how a 22kg static object can generate over 100kg of lateral tearing force.
3. Railing Integrity & Absolute Liability
Before purchasing hardware, you must physically interrogate your balcony architecture. Shake the railing violently. If you detect any lateral wobble, visible rust at the weld points, or concrete spalling (cracking/dusting) where the posts enter the masonry, halt immediately. You cannot safely mount 20kg+ of hardware to a compromised structure.
The Legal Reality:
If a storm dislodges a panel from a 4th-floor flat because you mounted it to a rusting balustrade, it becomes a lethal, 20kg glass-and-aluminum projectile. You—not the manufacturer, and not the landlord—are legally liable for criminal negligence and all resulting property damage or fatalities. Non-destructive clamp mounts only work if the structure they are clamping to is flawless.
Ecosystem vs. Universal Hardware: What to Buy
Securing 20kg of glass and aluminum 10 meters above the ground makes the mounting bracket the single most critical point of mechanical failure. When purchasing mounts, you must choose between the legal insulation of proprietary ecosystems or the immediate financial savings of universal third-party hardware.
Mechanical Risk Assessment: The Frame-Crush Hazard
Anodized aluminum solar frames are designed to bear dispersed aerodynamic loads, not intense, localized pinching forces. Applying incorrect torque with uncalibrated universal brackets creates immediate structural failure points.
Proprietary Brackets The Safe Bet
Opting for brand-specific gear, such as the EcoFlow Bracket for Semi-enclosed Balconies (roughly £99) or their Lightweight Bracket system (£119), is an exercise in risk mitigation rather than mere aesthetic matching. The primary advantage here is liability transfer. When you purchase an ecosystem mount, the manufacturer has pre-calculated the exact tolerance, depth, and aerodynamic stress limits of their specific solar panels.
If a severe UK gale strikes and an EcoFlow bracket fails while securing a compatible EcoFlow panel, the ecosystem warranty covers the failure (assuming proper, documented installation). You are purchasing an insurance policy masquerading as a piece of metal. For renters concerned about liability to third-party property below their balcony, this unbroken "chain of liability" offers critical legal insulation.
Universal Brackets The Cost-Saver
Universal, third-party options—such as adjustable 304 stainless steel balcony brackets (typically costing around £40)—represent a significant reduction in capital expenditure. These brackets are highly versatile, often utilizing hook-and-clamp systems designed to accommodate non-standard balcony railings ranging from 60mm to 180mm in depth.
The Clinical Warning: While cost-effective, universal gear shifts the liability entirely onto the installer (you). The severe risk lies in the clamping mechanism. If you over-tighten a cheap, poorly sized third-party clamp, you will instantly crush or dent the anodized aluminum frame of your solar panel. Because the aluminum frame acts as the structural spine protecting the tempered glass, crushing it creates micro-fractures. This mechanical damage instantly and permanently voids the panel's 10 to 15-year performance warranty.
Recommended Universal Hardware Setup
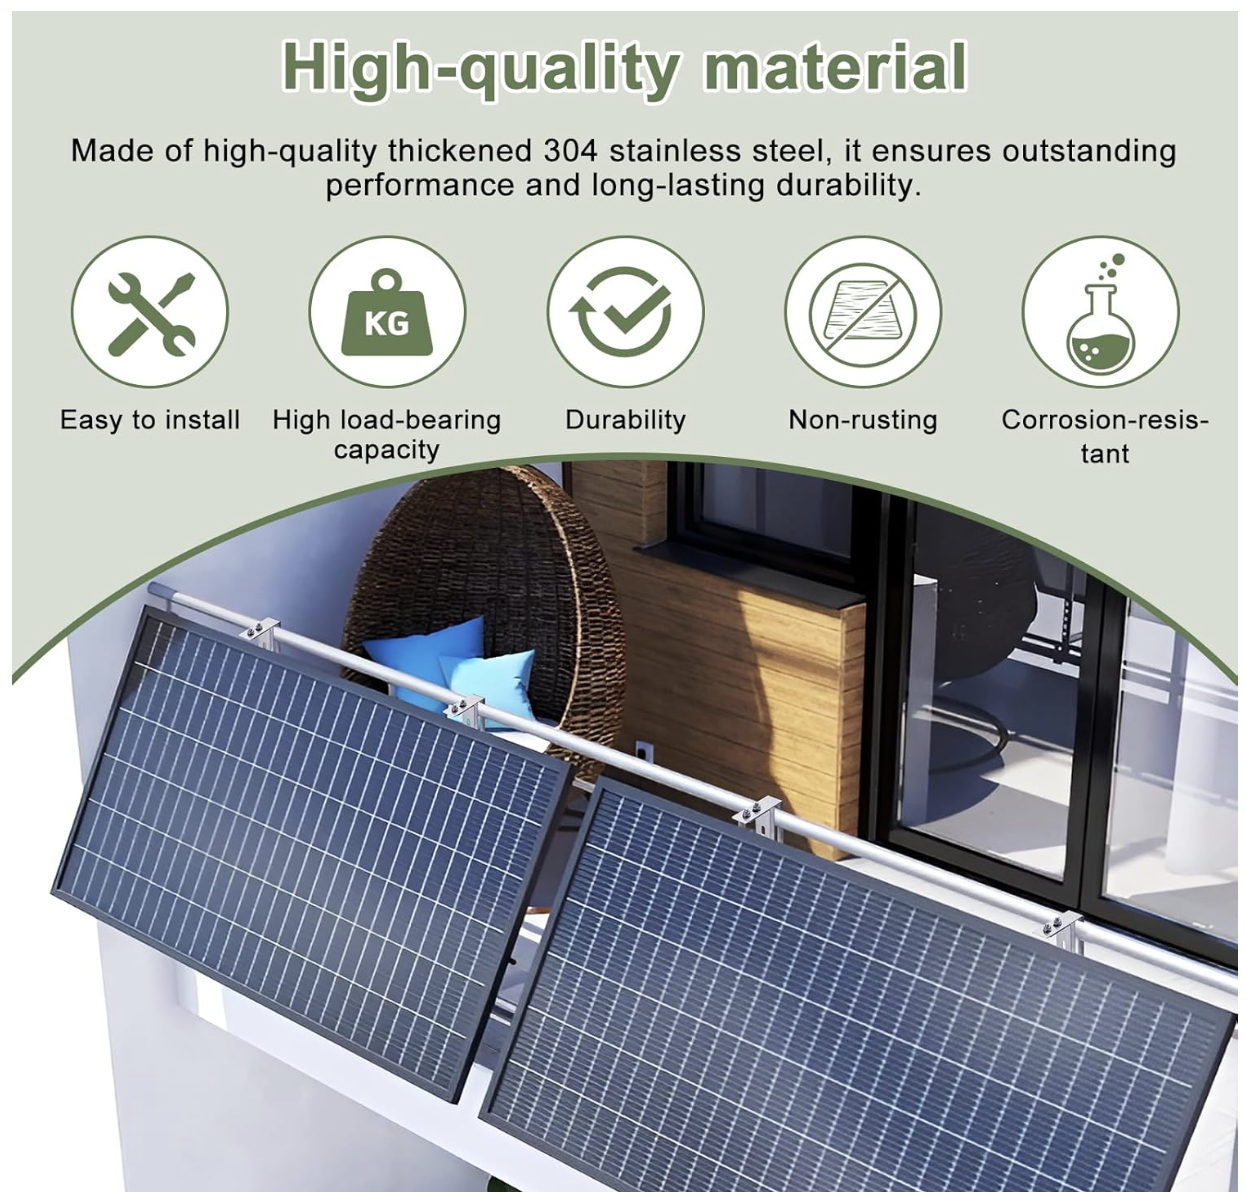
If you choose the universal route to minimize costs, you must select heavy-duty, marine-grade materials that resist UK weather degradation while offering precision adjustability to prevent frame crushing.
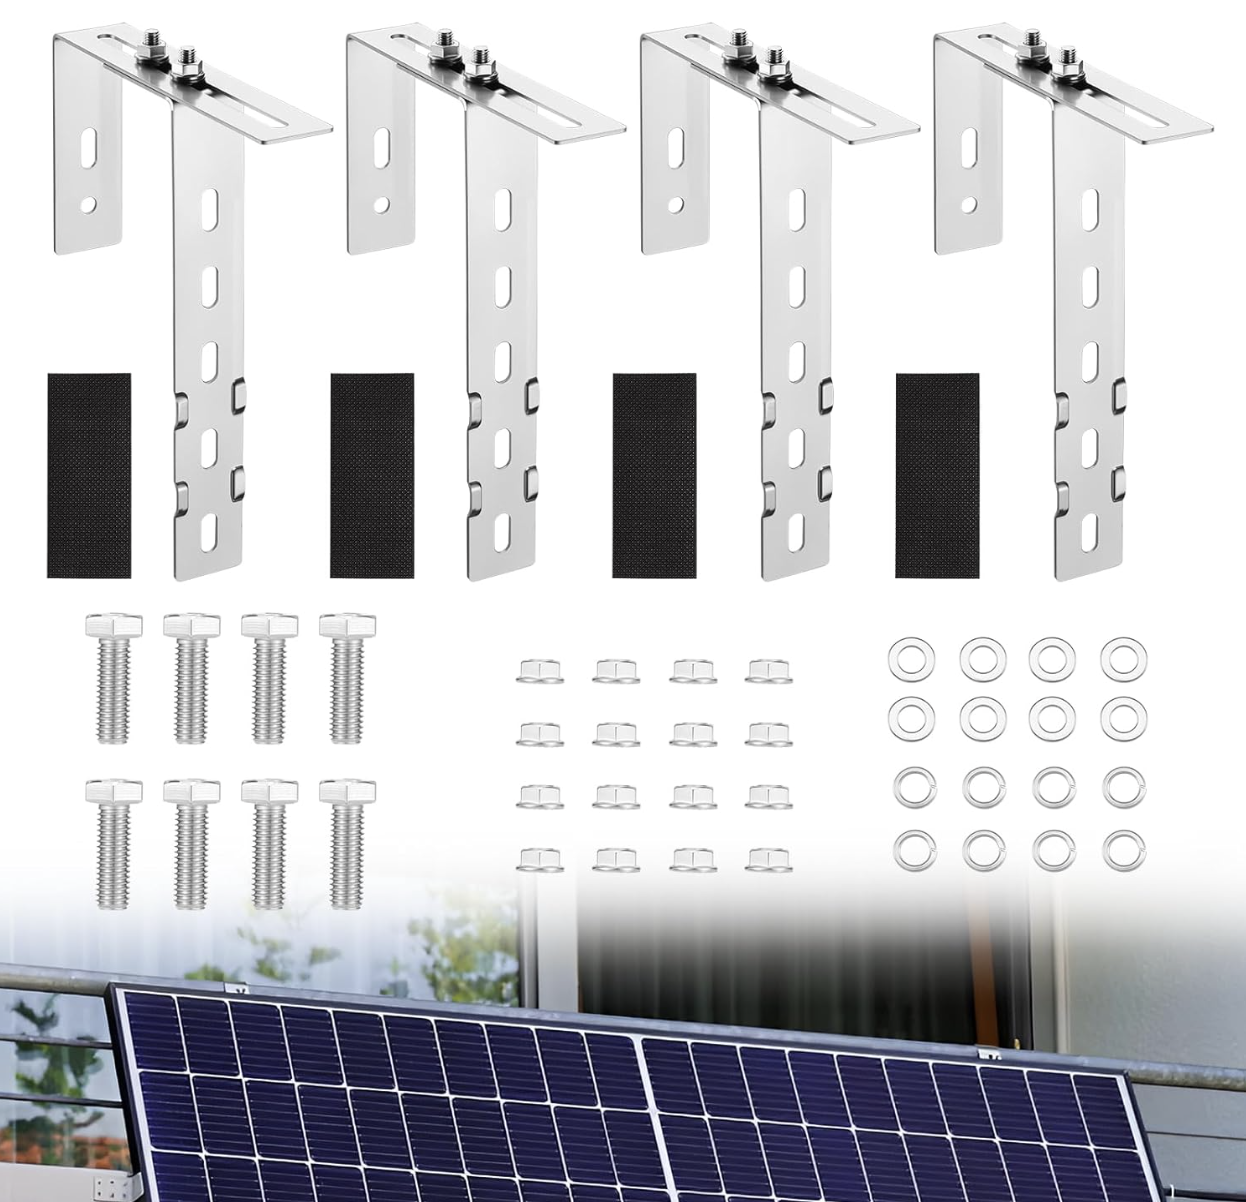
eROOSY Adjustable Solar Balcony Brackets (304 Stainless Steel)
Designed for UK balcony power stations, these brackets accommodate railings from 60mm to 180mm. The 304 stainless steel construction prevents the severe rust degradation common in cheaper galvanized iron alternatives. Crucially, the adjustable hook mechanism allows for a secure fit without requiring excessive, frame-crushing torque on the panel itself.
- High-tensile 304 Stainless Steel construction
- Compatible with standard UK balustrade dimensions (60-180mm)
- Zero-drilling required (Tenancy safe)
- Includes protective rubber shims to prevent railing scratches
1. The Mechanical Scratch Problem
Most plug-and-play solar kits assume you own the property you are mounting them to. They supply heavy-duty steel U-bolts and clamps designed for maximum grip, with zero regard for surface preservation. Metal-on-metal clamping is catastrophic for renters. The sheer weight of an 800W array (upwards of 40kg), combined with the tightening torque required to secure it, will immediately strip the paint or powder coating off your landlord's metal railing.
Furthermore, the UK climate ensures high wind loads. If a panel is clamped metal-to-metal, wind chatter (micro-vibrations) will act like coarse sandpaper, grinding the protective finish away over a 12-month period. When your tenancy ends and you remove the setup, you will expose raw, rusted metal beneath. Your landlord will rightly deduct the cost of professional sanding, priming, and repainting from your deposit.
The Clinical Solution: EPDM Isolation. Never let metal touch metal. You must purchase high-density EPDM (Ethylene Propylene Diene Monomer) rubber strips or heavy-duty neoprene pads. Wrap the railing entirely before applying the clamp. This creates a non-destructive barrier that prevents scratches and absorbs the kinetic energy of wind chatter.
2. Galvanic Corrosion (The Invisible Destroyer)
Scratching the paint is a mechanical failure; Galvanic Corrosion is a chemical failure. This occurs when two electrochemically dissimilar metals are brought into physical contact in the presence of an electrolyte (which, in the UK, is simply rainwater).
Solar panels are framed in anodized aluminium. If you secure them using a cheap, non-treated carbon steel or zinc-plated bracket (common in budget kits from overseas), the aluminium frame will act as an anode and sacrifice its electrons to the steel. The result is rapid, aggressive rusting of the clamp and severe pitting of the panel frame within a single British winter. This rust will bleed down the balustrade, permanently staining the concrete or brickwork below—another guaranteed deposit deduction.
The Metallurgical Solution: Material Matching. You must strictly ensure that your mounting hardware is either 304/316 Marine Grade Stainless Steel or identically Anodized Aluminium. These materials possess similar anodic indices, neutralizing the galvanic reaction and ensuring your installation survives wet weather without bleeding iron oxide onto the property.
Mounting Anatomy Simulator
⚠️ Warning: Current setup guarantees deposit deduction.
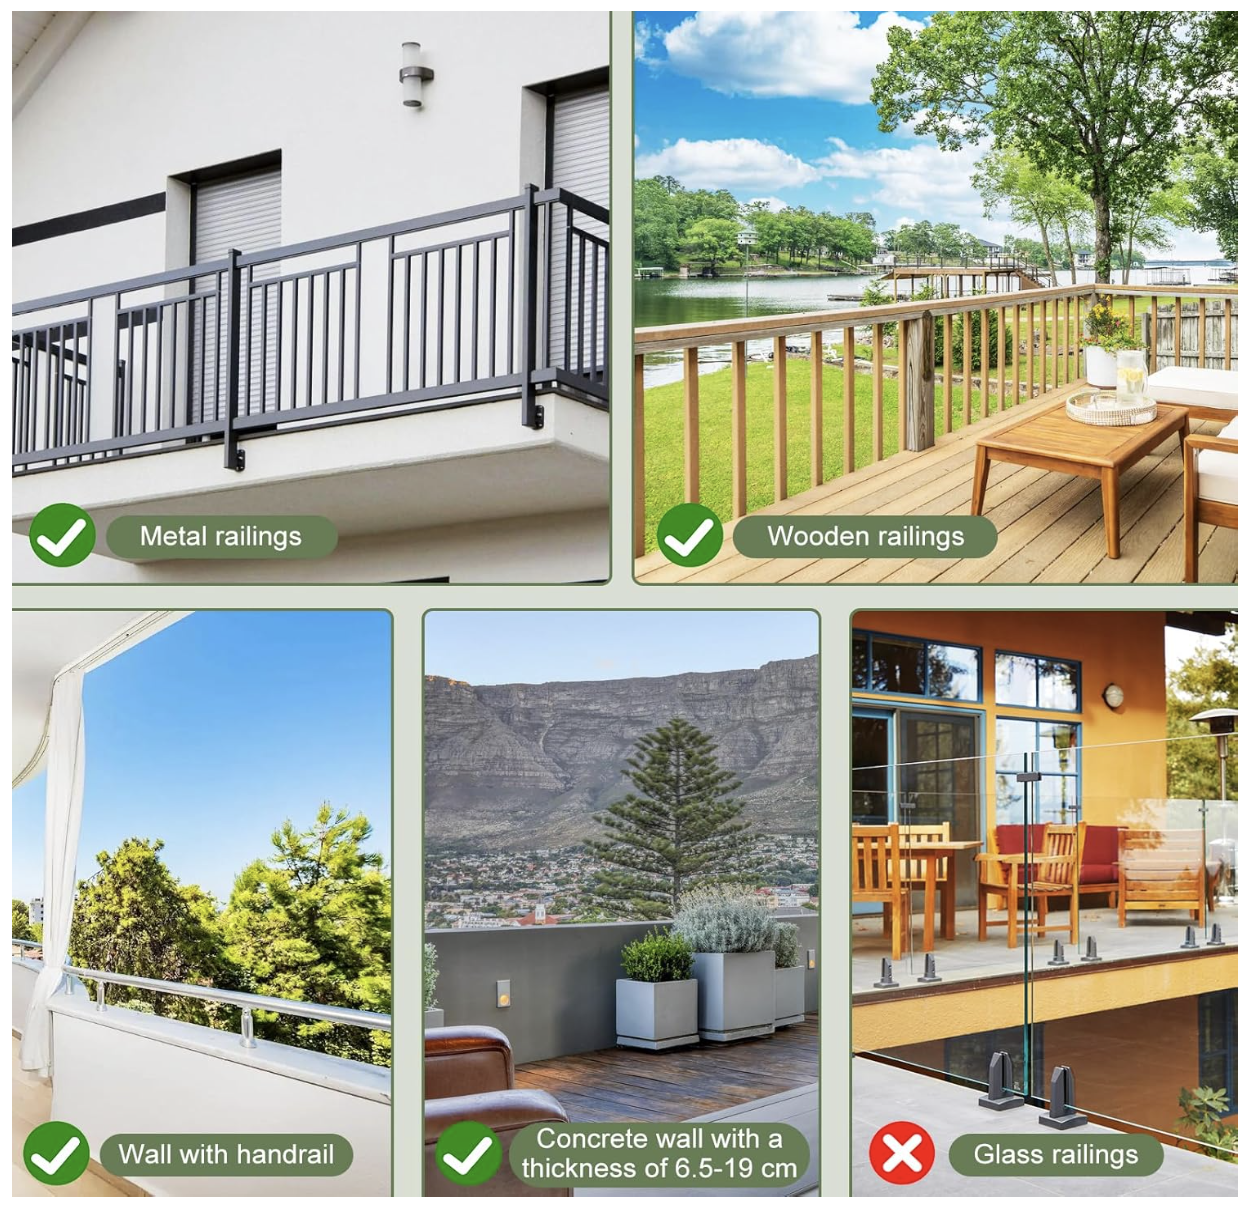
Critical Warning: Glass Balconies
Structural failure and glass shattering are inevitable if improper mounting hardware is used.
The 5-Step "No-Trace" Protocol
Measure and Pad
Before any hardware touches the balcony structure, you must establish a protective friction barrier. The primary cause of deposit disputes in balcony solar installations is metal-on-metal scratching caused by wind micro-vibrations.
Execution: Measure the circumference of the upper handrail and the lower vertical stanchions. Cut industrial-grade EPDM rubber padding (typically 3mm to 5mm thick) to match these exact contact points. Wrap the railing tightly before introducing the clamp hooks.
The Safety Tether (Crucial)
This is the most critical phase of the operation. A standard 400W+ solar panel weighs between 20kg and 25kg. Operating at height introduces severe kinetic liability.
Execution: Before lifting the panel over the leading edge of the balcony, you must securely attach an independent, braided steel wire rope tether (minimum 4mm diameter) from the pre-drilled holes in the panel's aluminum frame directly to a solid structural point on the railing.
The Dry Fit
Never commit to full torque immediately. You must ensure the structural geometry is correct and the weight is evenly distributed across the balustrade.
Execution: Hook the primary upper brackets over the rubber-padded rail. Let the panel hang naturally. Insert the lower vertical stabilizer arms but do not tighten any bolts beyond a loose finger-tightness. Step back and visually inspect the angle, ensuring the panel is perfectly level and not inducing torsional twist on the railing structure.
Torque and Lock
Once the geometry is confirmed during the dry fit, the assembly must be mechanically locked against dynamic environmental loads (primarily uplift and vibration from UK wind patterns).
Execution: Tighten the clamps evenly in a cross-pattern to ensure uniform pressure against the railing. Discard standard hex nuts provided by cheaper kits.
Cable Management
Dangling cables are an electrical hazard and a major point of mechanical failure. Wind will whip loose MC4 cables against the sharp metal edges of the panel frame or balcony, eventually stripping the insulation and exposing live DC current (up to 60V per panel).
Execution: Route the cables tightly along the inside of the aluminum panel frame. Secure them using heavy-duty, UV-resistant zip ties (black nylon, not white indoor ties which degrade quickly in sunlight). Ensure the connectors are tucked securely out of direct weather exposure.